

close

Recipes

Recipes

How to Scale a Recipe Up or Down for Any Crowd Size

Cooking for a crowd or shrinking a family recipe down for a single portion is one of the most practical skills a home cook can develop. Whether you are scaling up a weekend chili recipe to feed twenty guests at a neighborhood gathering or scaling down a massive holiday roast to serve a quiet weeknight dinner for two, the kitchen math can feel intimidating. Many home cooks make the mistake of assuming that recipe scaling is a linear equation across every single ingredient. They double the garlic, quadruple the salt, or multiply the baking powder by five, only to find that the final dish is overwhelmingly pungent or completely flat. Mastering the science of recipe adjustment requires understanding which ingredients multiply directly and which require careful calculation, ensuring that flavor, texture, and chemistry remain balanced regardless of the yield.

The Core Mathematics of Scaling Recipes

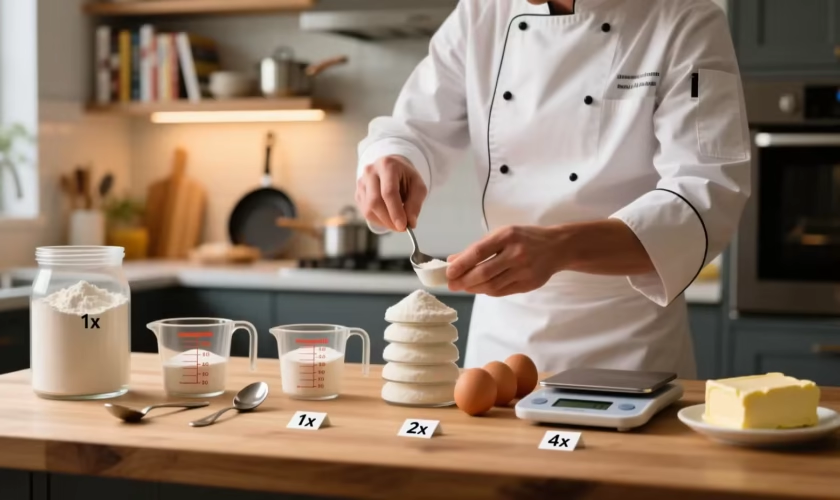
The foundation of scaling any recipe begins with determining your conversion factor. This number is calculated by dividing your desired yield by the original yield listed in the recipe. For example, if a standard soup recipe serves four people and you want to feed twelve guests, your desired yield of twelve divided by the original yield of four gives you a conversion factor of three. Every single ingredient measurement in that recipe must be multiplied by three to maintain the proper ratio.
However, writing down the math is much easier than executing it in the kitchen. Fractional measurements frequently cause confusion during scaling. If a recipe calls for three-quarters of a teaspoon of cumin and you need to multiply it by a factor of one and a half, you end up with one and one-eighth teaspoons, which is difficult to measure accurately using standard home kitchen tools. Rounding measurements slightly up or down is generally acceptable for herbs, spices, and aromatics, but precision becomes critical when dealing with baking chemistry or powerful seasonings like salt and heat elements.
  • Determine the Multiplier: Divide your target yield by the original recipe yield to find your exact scaling factor.
  • Convert Units Before Math: Convert complex measurements into smaller, uniform units before multiplying. For instance, convert two cups into thirty-two tablespoons to make fractional multiplication much simpler.
  • Write Down Your Conversions: Keep a scratchpad nearby to calculate all adjusted measurements before you turn on the stove, preventing costly calculation errors mid-cooking.

Why Some Ingredients Do Not Scale Linearly

The most common pitfall in recipe scaling is applying the conversion factor blindly to every single component, particularly in baking and seasoning. In savory cooking, potent ingredients like salt, pepper, garlic, chili powder, and alcohol do not scale up linearly. If you double a stew recipe, doubling the salt right away often results in an overly salty dish because salt concentrates as liquid evaporates during long cooking times. Professional chefs always recommend scaling strong seasonings up by about seventy-five percent initially, tasting the dish as it cooks, and adding more toward the end if necessary.
Baking is an entirely different scientific challenge because it relies on precise chemical reactions. When scaling a cake or bread recipe up or down, leavening agents such as baking powder, baking soda, and yeast rarely scale in a direct linear fashion. If you triple a cake recipe, tripling the baking powder can cause the structure to rise too fast and collapse under its own weight. Bakers usually scale leavening agents by a slightly lower factor, increasing them by roughly eighty percent of the total multiplier to maintain structural integrity.
  • Season Gradually: Add salt, acid, and spices in increments rather than dumping the full calculated amount into a large batch all at once.
  • Be Cautious With Liquid: When scaling up large batches of soup, stock, or sauces, liquid does not evaporate at the same proportional rate in a massive stockpot as it does in a standard saucepan, which can leave your final dish too watery.
  • Adjust Cooking Times: Doubling the volume of a casserole or pot of stew means it will take significantly longer to reach the proper internal temperature, requiring adjustments to oven temperatures or cook times.

Equipment Adjustments for Different Crowd Sizes

Changing the volume of food you are preparing means your standard kitchen equipment might no longer be appropriate for the task. Trying to double a cookie dough recipe and baking them on the same two baking sheets will cause overcrowding, leading to cookies that steam against each other instead of developing crisp edges. Similarly, attempting to cook a quadrupled batch of risotto in a standard ten-inch skillet will crowd the pan, preventing proper liquid absorption and ruining the texture.
When scaling up, ensure you have the appropriate vessel size, such as transitioning from a skillet to a wide Dutch oven or utilizing multiple baking sheets rotated halfway through the cooking time. Conversely, scaling down a roasting recipe for one or two people means a massive roasting pan will expose too much surface area, causing the pan juices to burn rapidly before the meat can cook through. Downsizing your cookware to match smaller portions protects your food from burning and ensures even heat distribution.

Frequently Asked Questions

How do I handle an egg when cutting a baking recipe in half?

If a recipe calls for an odd number of eggs, such as one egg, and you are halving it, crack the egg into a small bowl, beat it thoroughly with a fork, and use half of the total liquid volume by measuring it out with a tablespoon.

Why do my doubled spice blends taste much stronger than the original recipe?

Spices contain volatile oils that concentrate differently in large-batch cooking. When scaling up dishes that rely heavily on strong spices, start by multiplying them by one and a half instead of doubling them completely, then adjust to taste.

Does cooking time automatically double if I double a recipe?

No, cooking time is rarely a direct multiplier. While a doubled casserole or roast will take longer to cook, it usually only requires an extra twenty to thirty percent more time rather than double the duration, depending on the surface area and depth of the pan.

What is the best way to scale slow cooker recipes?

Slow cookers rely on consistent moisture retention and heat distribution. When scaling down, ensure the slow cooker is at least half full, otherwise the food will cook too fast and dry out. When scaling up, never fill a slow cooker past the three-quarter mark.

How do I adjust liquid measurements when scaling pasta sauces?

When scaling up pasta sauces, reduce the added water or broth slightly. Large batches of sauce do not lose moisture through evaporation at the same rate as small batches, which can leave your sauce overly thin.

Can I scale candy-making or caramel recipes easily?

Candy-making is notoriously difficult to scale because sugar crystal formation and moisture evaporation depend entirely on surface area and heat transfer. It is usually safer to make two separate batches of caramel or candy rather than trying to scale a single batch significantly.

How do I prevent large batches of soup from scorching at the bottom?

As a pot gets larger and deeper, the food at the bottom sits closer to the direct heat source. When scaling up soups or sauces, use a heavy-bottomed pot and stir frequently with a flat-bottomed wooden spoon to prevent the solids from settling and burning.
read more
Recipes

Easy Homemade Bread Recipes for Total Beginners

Baking bread at home often feels like an intimidating culinary mountain. Many people imagine spending hours kneading sticky dough, dealing with complicated sourdough starters, or waiting anxiously for hours only to pull a dense brick out of the oven. The truth is that baking rustic, delicious bread does not require professional training or expensive equipment. With the right beginner-friendly recipes and a few basic ingredients like flour, water, yeast, and salt, anyone can master the fundamentals of baking. The aroma of freshly baked bread filling your home is one of the most rewarding experiences in the kitchen. By starting with simple methods that require minimal active work, you can build your confidence and discover how surprisingly straightforward the bread-making process truly is.

The Magic of No-Knead Artisan Bread

The absolute best starting point for any beginner is the famous no-knead bread method. Popularized by master bakers, this technique eliminates the most tedious and confusing part of traditional baking by letting time do the work instead of your muscles. Instead of vigorous kneading, a wet, sticky dough is mixed quickly in a bowl and left to ferment slowly on your kitchen counter for twelve to eighteen hours. During this long resting period, the yeast consumes the natural sugars in the flour, producing bubbles of carbon dioxide and building strong gluten networks entirely on its own.
The secret weapon for this recipe is a heavy cast-iron Dutch oven with a lid. By baking the wet dough inside a preheated, covered pot, you trap the moisture released by the bread as it heats up. This creates a steamy micro-climate that mimics a professional steam-injected commercial oven, allowing the loaf to expand fully before the crust hardens. Once the lid is removed for the final minutes of baking, the crust turns a deep, gorgeous golden brown with a satisfying crunch.
  • Simple Ingredients: You only need four pantry staples, which include bread flour, active dry or instant yeast, kosher salt, and lukewarm water.
  • Minimal Effort: Total active preparation time takes less than ten minutes, making it ideal for busy schedules.
  • Professional Results: The resulting loaf features a chewy, open-crumb interior and a shatteringly crisp crust that looks like it came from an artisanal bakery.

Simple Sandwich Bread for Everyday Toast

While crusty artisan boules are incredible for dinner, everyday life often calls for soft, sliceable sandwich bread. This style of bread requires a bit more structure and a gentle kneading process, but it remains remarkably accessible for total beginners. Enriched sandwich dough typically incorporates a small amount of fat, such as melted butter, milk, or oil, along with a touch of sugar or honey. These ingredients soften the crumb and create a tender, uniform texture that holds up perfectly to peanut butter, jelly, or deli meats.
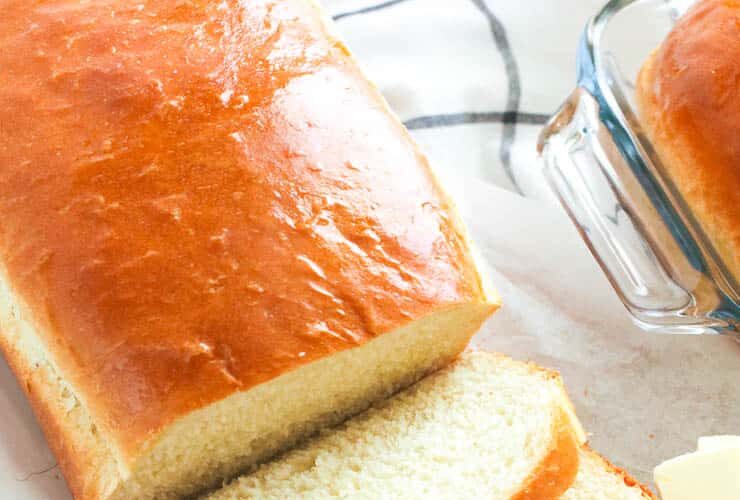
The process involves mixing the ingredients into a shaggy dough, turning it out onto a clean counter, and kneading it for about eight to ten minutes until the surface feels smooth and elastic. After an initial rise in a warm spot, you shape the dough into a log and place it directly into a standard loaf pan for its second rise. Baking in a loaf pan ensures the bread grows upward, creating those classic uniform slices you need for morning toast or lunch sandwiches.
  • Kneading Technique: Push the dough away from you with the heel of your hand, fold it back over itself, give it a quarter turn, and repeat rhythmically.
  • The Windowpane Test: To check if your dough has been kneaded enough, stretch a small piece gently between your fingers; if it stretches thin enough to let light pass through without tearing, it is ready.
  • Butter the Crust: Rubbing a pat of butter over the hot crust right as it comes out of the oven softens the exterior and adds a rich, glossy finish.

Essential Tips for Yeast Success

Working with yeast can feel mysterious to beginners, but understanding a few basic rules ensures your dough rises successfully every single time. Yeast is a living organism that needs the right environment to thrive, which means temperature control is your most important variable during the mixing stage.
If your water is too cold, the yeast will remain dormant and nothing will happen. If your water is too hot, exceeding 120 degrees Fahrenheit, you will kill the yeast entirely and ruin your batch. Aim for lukewarm water that feels comfortable against the inside of your wrist, similar to a baby bottle. Additionally, always check the expiration date on your yeast package, as old yeast loses its potency and will fail to lift heavy bread dough.
  • Salt Placement: Never let salt touch dry yeast directly when adding ingredients to your bowl, because high concentrations of salt can inhibit or kill yeast activity.
  • Warm Environment: If your kitchen is drafty or cold, let your dough rise inside the oven with the interior light turned on, which provides a gentle, cozy heat source.
  • Patience Pays Off: Do not rush the rising process. Letting dough take its time develops complex flavors that make homemade bread taste significantly better than store-bought loaves.

Frequently Asked Questions

What is the difference between active dry yeast and instant yeast?

Active dry yeast needs to be dissolved in warm water before mixing with flour to activate it. Instant yeast is milled into finer particles and can be mixed directly into the dry ingredients without prior rehydration, making it slightly faster to use.

Can I use all-purpose flour instead of bread flour?

Yes, all-purpose flour works fine for most beginner recipes. However, bread flour contains a higher protein content, which creates more gluten and results in a chewier texture and better rise for artisanal loaves.

Why did my bread turn out dense and heavy instead of fluffy?

Dense bread usually happens for one of three reasons: the yeast was old and inactive, the water temperature was too hot and killed the yeast, or the dough did not rise long enough during the fermentation stage.

How should I store homemade bread to keep it fresh?

Store your cooled homemade bread in a paper bag, a linen bread bag, or a loosely closed plastic bag at room temperature. Avoid putting fresh bread in the refrigerator, as the cold environment accelerates starch retrogradation and makes the bread stale much faster.

Can I freeze homemade bread for later use?

Homemade bread freezes exceptionally well. Slice the loaf completely before freezing, place pieces of parchment paper between the slices, and store them in a heavy-duty freezer bag so you can toast single servings whenever you want.

How do I know when my loaf of bread is fully baked inside?

The most accurate way to test for doneness is using an instant-read thermometer inserted into the center of the loaf. When the internal temperature reaches 200 degrees Fahrenheit, the bread is fully baked.

Do I need a stand mixer to make homemade bread successfully?

A stand mixer equipped with a dough hook attachment is convenient, but it is certainly not required. Hand kneading or using the no-knead method allows you to make incredible bread using nothing more than a wooden spoon, a bowl, and your hands.
read more
Recipes

Decadent Plant-Based Dessert Recipes Everyone Will Love

Plant-based baking has evolved far beyond dry cookies and tasteless fruit bowls. Today, dairy-free and egg-free desserts rival their traditional counterparts in richness, texture, and flavor. Whether you are hosting a dinner party, catering to dietary restrictions, or simply trying to incorporate more whole foods into your diet, these decadent recipes will satisfy every sweet tooth. Forget the myth that vegan desserts require obscure ingredients or complex techniques. With pantry staples like coconut cream, dark chocolate, and nut butter, you can create showstopping treats that even the most dedicated skeptics will adore.

1. Silky Double Chocolate Avocado Mousse

Many people hesitate when they hear avocado in a dessert, but this fruit transforms into an ultra-creamy, luxurious pudding that tastes remarkably decadent. The natural healthy fats in avocados mimic the mouthfeel of heavy cream, while the cocoa powder completely masks any savory notes.

Ingredients

  • Two ripe Hass avocados, pitted and peeled
  • One-half cup unsweetened cocoa powder or high-quality cacao powder
  • One-half cup pure maple syrup or agave nectar
  • One-third cup unsweetened almond milk or oat milk
  • One teaspoon pure vanilla extract
  • One-quarter teaspoon sea salt
  • Dairy-free chocolate shavings for garnish

Instructions

  1. Place the peeled avocados, cocoa powder, maple syrup, non-dairy milk, vanilla extract, and sea salt into a high-speed food processor.
  2. Blend on high speed for two to three minutes until completely smooth, stopping to scrape down the sides as needed.
  3. Taste the mousse and adjust the sweetness if necessary by adding a splash more maple syrup.
  4. Spoon the mixture into individual serving glasses or ramekins.
  5. Chill in the refrigerator for at least one hour before serving to let the flavors meld and the texture firm up.
  6. Garnish with dairy-free chocolate shavings and fresh berries just before serving.

2. No-Bake Salted Caramel Cheesecake

Cashews form the ultimate base for raw, vegan cheesecakes. When soaked and blended, they achieve a velvety consistency that rivals cream cheese without any dairy. Combined with a gooey date-and-pecan crust and a rich coconut caramel, this dessert is an absolute showstopper.

Ingredients

  • For the crust: One and one-half cups raw pecans, one cup pitted Medjool dates, one tablespoon coconut oil, and a pinch of salt.
  • For the filling: Two cups raw cashews soaked in hot water for two hours and drained, one-half cup full-fat canned coconut milk, one-half cup maple syrup, one-fourth cup fresh lemon juice, one-third cup melted coconut oil, and one teaspoon vanilla extract.
  • For the caramel: One-half cup Medjool dates, two tablespoons coconut cream, one tablespoon maple syrup, and flaky sea salt for topping.

Instructions

  • Line an eight-inch springform pan with parchment paper.
  • Pulse the pecans, dates, coconut oil, and salt in a food processor until a sticky crumb forms, then press firmly into the bottom of the pan.
  • Blend the soaked cashews, coconut milk, maple syrup, lemon juice, melted coconut oil, and vanilla extract in a high-speed blender until completely smooth and creamy.
  • Pour the filling over the crust and tap the pan gently to release any air bubbles. Freeze for four hours.
  • Blend the caramel ingredients until smooth, drizzle over the chilled cheesecake, and sprinkle with flaky sea salt before slicing.

3. Decadent Peanut Butter Lava Cakes

Warm, gooey center desserts often rely on eggs and butter to achieve their molten texture. This plant-based version uses baking powder and a carefully timed bake to create a fluffy outer cake with a rich, molten peanut butter and chocolate center.

Ingredients

  • One cup all-purpose flour or a gluten-free one-to-one baking blend
  • One-third cup coconut sugar or organic cane sugar
  • One-fourth cup unsweetened cocoa powder
  • One teaspoon baking powder
  • One cup unsweetened plant-based milk
  • One-third cup melted coconut oil
  • One teaspoon apple cider vinegar
  • Four tablespoons natural creamy peanut butter mixed with one tablespoon maple syrup for the molten core

Instructions

  • Preheat your oven to 375 degrees Fahrenheit and grease four ramekins with coconut oil.
  • Whisk together the flour, coconut sugar, cocoa powder, and baking powder in a medium mixing bowl.
  • Pour in the plant milk, melted coconut oil, and apple cider vinegar, stirring gently until just combined into a smooth batter.
  • Divide half of the batter among the four prepared ramekins.
  • Drop one tablespoon of the sweetened peanut butter mixture directly into the center of each ramekin.
  • Cover the peanut butter with the remaining chocolate batter, ensuring the center is fully enclosed.
  • Bake for 18 to 20 minutes until the edges are set but the center still jiggles slightly.
  • Let cool for five minutes, run a knife around the edges, and invert onto serving plates.

4. Raspberry Almond Tart with Shortbread Crust

This elegant dessert balances the tartness of fresh raspberries with a sweet, nutty almond filling and a buttery shortbread crust made entirely without dairy. It looks like it came straight from a high-end French bakery while remaining remarkably simple to prepare at home.

Ingredients

  • For the crust: One and three-quarter cups almond flour, one-quarter cup melted coconut oil, three tablespoons maple syrup, and one teaspoon almond extract.
  • For the filling: One and one-half cups raw blanched almonds soaked and drained, one-half cup coconut cream, one-third cup maple syrup, two tablespoons lemon juice, and one teaspoon vanilla extract.
  • For the topping: Two cups fresh raspberries and two tablespoons apricot jam thinned with warm water for glazing.

Instructions

  • Combine the almond flour, melted coconut oil, maple syrup, and almond extract until a dough forms. Press evenly into a tart pan with a removable bottom and bake at 350 degrees Fahrenheit for 12 minutes until golden. Let cool completely.
  • Blend the soaked almonds, coconut cream, maple syrup, lemon juice, and vanilla extract until ultra-smooth.
  • Spread the almond filling evenly into the cooled crust.
  • Arrange the fresh raspberries tightly on top of the filling in concentric circles.
  • Brush the thinned apricot jam gently over the raspberries to give them a glossy bakery finish. Chill for two hours before slicing.

Frequently Asked Questions

What can I use as a substitute for cashews in raw vegan cheesecakes?

If you have a nut allergy or simply do not have cashews on hand, you can substitute raw sunflower seeds or soaked macadamia nuts. Sunflower seeds provide a similar creamy texture when blended, though you may need to add a touch more sweetener to balance their earthy flavor.

Why do some vegan baked goods turn out dense or rubbery?

Vegan baking relies on the chemical reaction between acids like apple cider vinegar or lemon juice and leavening agents like baking soda or baking powder to create rise. If you overmix the batter, you develop the gluten in the flour or release the trapped air bubbles, leading to a heavy texture. Always mix just until the ingredients combine.

Can I freeze plant-based desserts for later consumption?

Most plant-based desserts, particularly no-bake cheesecakes, raw tarts, and certain cookies, freeze exceptionally well. Cheesecakes and tarts can be sliced, wrapped tightly in parchment paper and foil, and stored in the freezer for up to two months. Thaw them in the refrigerator for a few hours before serving.

How do I ensure my coconut whipped cream holds its shape?

To make stable whipped cream from canned coconut milk, you must use full-fat coconut milk or coconut cream and chill the can in the refrigerator overnight. This separates the solid cream from the watery liquid. Scoop out only the solid top layer and whip it with cold beaters, adding a touch of powdered sugar and vanilla extract.

Are all dark chocolates automatically plant-based?

Not all dark chocolate is vegan. While cocoa solids and sugar are plant-based, manufacturers frequently add milk fat, whey, or butter oil to commercial dark chocolate bars to improve texture and shelf life. Always read the ingredient label carefully to ensure the product is dairy-free.

How can I make these dessert recipes completely gluten-free?

Most of the recipes in this collection can be made gluten-free by swapping traditional all-purpose flour for a certified gluten-free one-to-one baking flour blend. For crusts that call for grains or cookies, ensure you use certified gluten-free oats or alternative flours like almond and coconut flour.
read more
1 2 3 5
Page 1 of 5